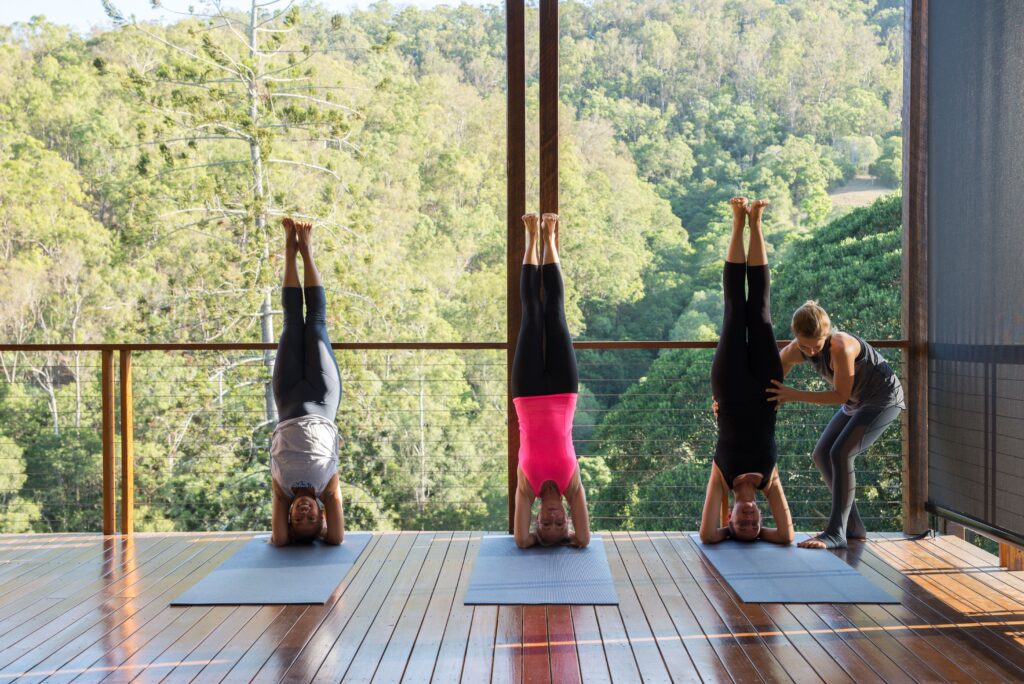
Sirsa implies the head. This asana is also known as the headstand pose and is one of the most important poses in yoga. Sirsasana is a basic posture that has several variations.
How to perform Sirsasana
1. Place a blanket with four folds on the ground and kneel near it.
2. Place your forearms in the centre of the folded blanket. The distance between your elbows on the ground should not exceed the width of your shoulders.
3. Interlock the fingers of both of your hands right up to the tips of the fingers, forming a cup with the help of your palms. Put the sides of your palms near where little fingers are placed on the blanket. When you are going on your head balancing the rest of your body, you should keep your fingers tightly locked. If you keep them loose, the weight of your body is put on them, making your arms ache. Hence, ensure to lock them well with each other.
4. Rest the top of your head on a folded blanket with the back of your head touching your cupped palms. Take care to place only the crown of your head on the blanket and neither your forehead nor the back of your head. Move your knees forward towards your head.
5. Once you have secured your head position, pull up the knees and raise them above the ground by moving the toes nearer to the head.
6. During an exhalation, gently swing from the ground and move the legs off the floor while keeping the knees bent. The movement of your legs should be so that both the feet are removed from the ground simultaneously. Once you have reached this position, slowly stretch your legs upwards, stretching your upper torso and then gently stretching your lower legs and the knees.
7. Fully stretch your legs and stand up straight with your head down. Your entire body should be at a ninety-degree angle to the ground.
8. After staying in this position from one to five minutes according to your capacity, reverse the movement by flexing your knees, taking the feet back towards the hips, then moving the upper legs forwards and sliding down your whole body to the ground.
9. If you are a beginner, you must do the pose with the assistance of a friend or do the pose against a wall. When practising the pose against a wall, the distance between your head and the wall should not exceed 2 or 3 inches. In case the distance is more than this, a curvature of your spine will protrude from your stomach. The weight of your whole body will be placed on your elbows, and your head position will be changed. This will lead to flushing your face and straining or puffing your eyes. Hence, a beginner should perform this pose in a corner where two walls meet with each other putting the head around 2-3 inches from either of the two walls.
10. A beginner doing this pose against a wall or in the corner should start with exhalation, pull the legs up, and while supporting your hips against the side of the wall, take the feet up. When in a corner, you can touch both the heels to either side of the walls for support. Then stretch your back and take it vertically upwards. Gradually learn to leave the support of the wall and try to master the balance without the support of the wall. Similarly, when coming down, you can rest your hips and feet against the wall, slide your body down, kneel, and rest your knees on the ground. The movements of going up and coming down should be down during exhalation.
Sirsasana Benefits
Western Physiology
Sirsasana has a therapeutic effect on mental and physical health.
- Sirsasana improves mental health:
- It relieves stress and increases focus (Longhurst, 2017).
- It helps people who suffer from loss of sleep, memory and vitality.
- Sirsasana improves blood circulation:
- Regularly practising Sirsasana helps flow pure, healthy blood through the brain’s cells, rejuvenating them, increasing the thinking power, and making the thoughts clearer. This pose works as a tonic for individuals whose brain tires easily.
- It also helps in improving the blood supply to the pituitary and pineal glands located in the brain, thereby improving our health, vitality and growth.
- Other therapeutic effects of Sirsasana include but are not limited to:
- It strengthens the arms and shoulders (Longhurst, 2017).
- It strengthens the lungs and helps relieve colds, coughs, tonsillitis, halitosis, bad breath, and palpitations.
- It improves digestion and helps with constipation (Longhurst, 2017).
- It also helps improve the haemoglobin content of the blood, thereby curing anaemia.
Yogic Physiology
This posture is an inversion and falls under the viparita group of postures, under the classification of asanas. It offers the practitioner an opportunity to change psychological perspective and face the fear of going upside down.
It puts pressure on the marma points of the forearms (indrabasti) and wrists (manibhanda) and if the head lightly touches a blanket it will massage the marma points of the skull, including the main marma (adhipati) and Sahasasara chakra.
This posture works udana vayu and this moves prana from heart to head, assisting in mental health and restriction of blood flow to head, neck and shoulders.
This posture will also work on (tarpaka kapha), which will relieve the kapha of the mind and sinuses and also the kapha of the heart (avalambaka kapha). The posture also reverses lymphatic flow, meaning it affects (Shleshaka Kapha), reducing any fluid retention around the lower limb and joints.
It increases heat and the pitta of the heart and mind (sadhaka pitta), and eyes (alochaka pitta).
Try and reduce heat of the posture for pitta types by softening the gaze, closing the eyes, moistening the tongue and practising cooling shitali and sitkari pranayama after the pose is completed. Long gentle breaths through the nose will also be beneficial.
Contradictions and Cautions
Individuals suffering from low or high blood pressure avoid this pose.
Advanced Steps
1. Follow the instructions described for beginners until step 4.
2. After you have secured the position of your head, stretch and move your legs upwards straight by taking your knees up from the ground. Take the toes of your feet nearer to your head, pressing your heels to the ground, keeping the position of the back erect.
3. Stretch the dorsal spine or the middle region of the spine, hold in this position for half a minute, and breathe normally and as gently as possible through the nose.
4. During an exhalation, raise your heels and move the toes off the ground while moving the hips backwards. Raise both of the legs upwards simultaneously while keeping both of them strong. Breathe once.
5. Again, during an exhalation, take the legs upwards till the legs come parallel to the ground. This pose is known as Urdhva Dandasana. Breathe normally and hold this position for around 10 seconds.
6. During an exhalation, move the legs upward and pull them vertically up. Breathe evenly and hold this pose for 1 to 5 minutes.
7. Gradually come down by reversing the movements. Place your feet on the ground, bend your knees, and lift your head off the ground or blanket.
8. While you are coming down, it is recommended to stay in the position of Urdhva Dandasana for around 60 seconds, according to your capacity.
Preparatory Asanas
Follow up Asanas
Tips for Beginners
Beginners often put too much weight on their neck and head when entering and exiting this pose, which can be potentially dangerous. Get ready for this posture as described above against a wall. To rise, put your hands in place and slightly raise your head from the floor. Move into the well-supported position with the head off the floor, then lower it lightly onto the floor. Support 90% to 95% of your weight on your shoulders and arms, even if that means you only have to stay for several seconds. Gradually, over time, increase the weight on your head, but move slowly. Similarly, when you come out of this pose, raise your head off the floor, then lower your legs. Eventually, you will succeed in keeping your head on the ground as you go up and down.
Variations
Eka Pada Sirsasana is one of the simplest variations of Sirsasana. Get into a pose. Lock your left leg perpendicular to the floor. Without disturbing the left position, exhale and lower your right leg parallel to the ground. The outer thigh of the lower leg (in this case, the right one) tends to sink towards the floor. To correct this, rotate your right leg outward, moving your sitting bone to the left. Hold the two sitting bones together and rotate (from the hip joint only) the right leg back to the neutral position. Hold for 10-30 seconds, inhale with the right leg, return to a perpendicular position, and repeat the same with the left for the same period of time.
Modifications and Props
First, it will be challenging to keep the balance in this pose. Perform Sirsasana against the wall. Press the knuckles of the clasped hands against the wall. If possible, perform the posture in the corner of a room so that the right-angled walls touch your shoulders, hips, and outer heels.
Deepen the Asana
Pay attention to the position of the inner wrists in the asana. They tend to fall outward, transferring weight to the outside of the forearms. Turn your little fingers away from the back of your head and place your inner wrists perpendicular to the floor. Actively press your wrists to the ground while squeezing the outer parts of your shoulders inward.
References
Longhurst, J. (2017). Benefits of headstand (Sirsasana) | Health Space Clinics. Health Space Clinics. Retrieved 16 July 2022, from https://healthspaceclinics.com.au/blog/benefits-of-headstand-sirsasana.
If you would like to contact Celia to learn more about the meditation teacher training journey, please do visit our Meditation Teacher Training Page or find us on Facebook or Instagram or contact Celia directly.